从零到一:构建企业级 SSL 证书管理系统
一个基于 Node.js + Express + MongoDB 的全栈 Web 应用开发实战
📋 目录
🎯 项目概述
项目背景
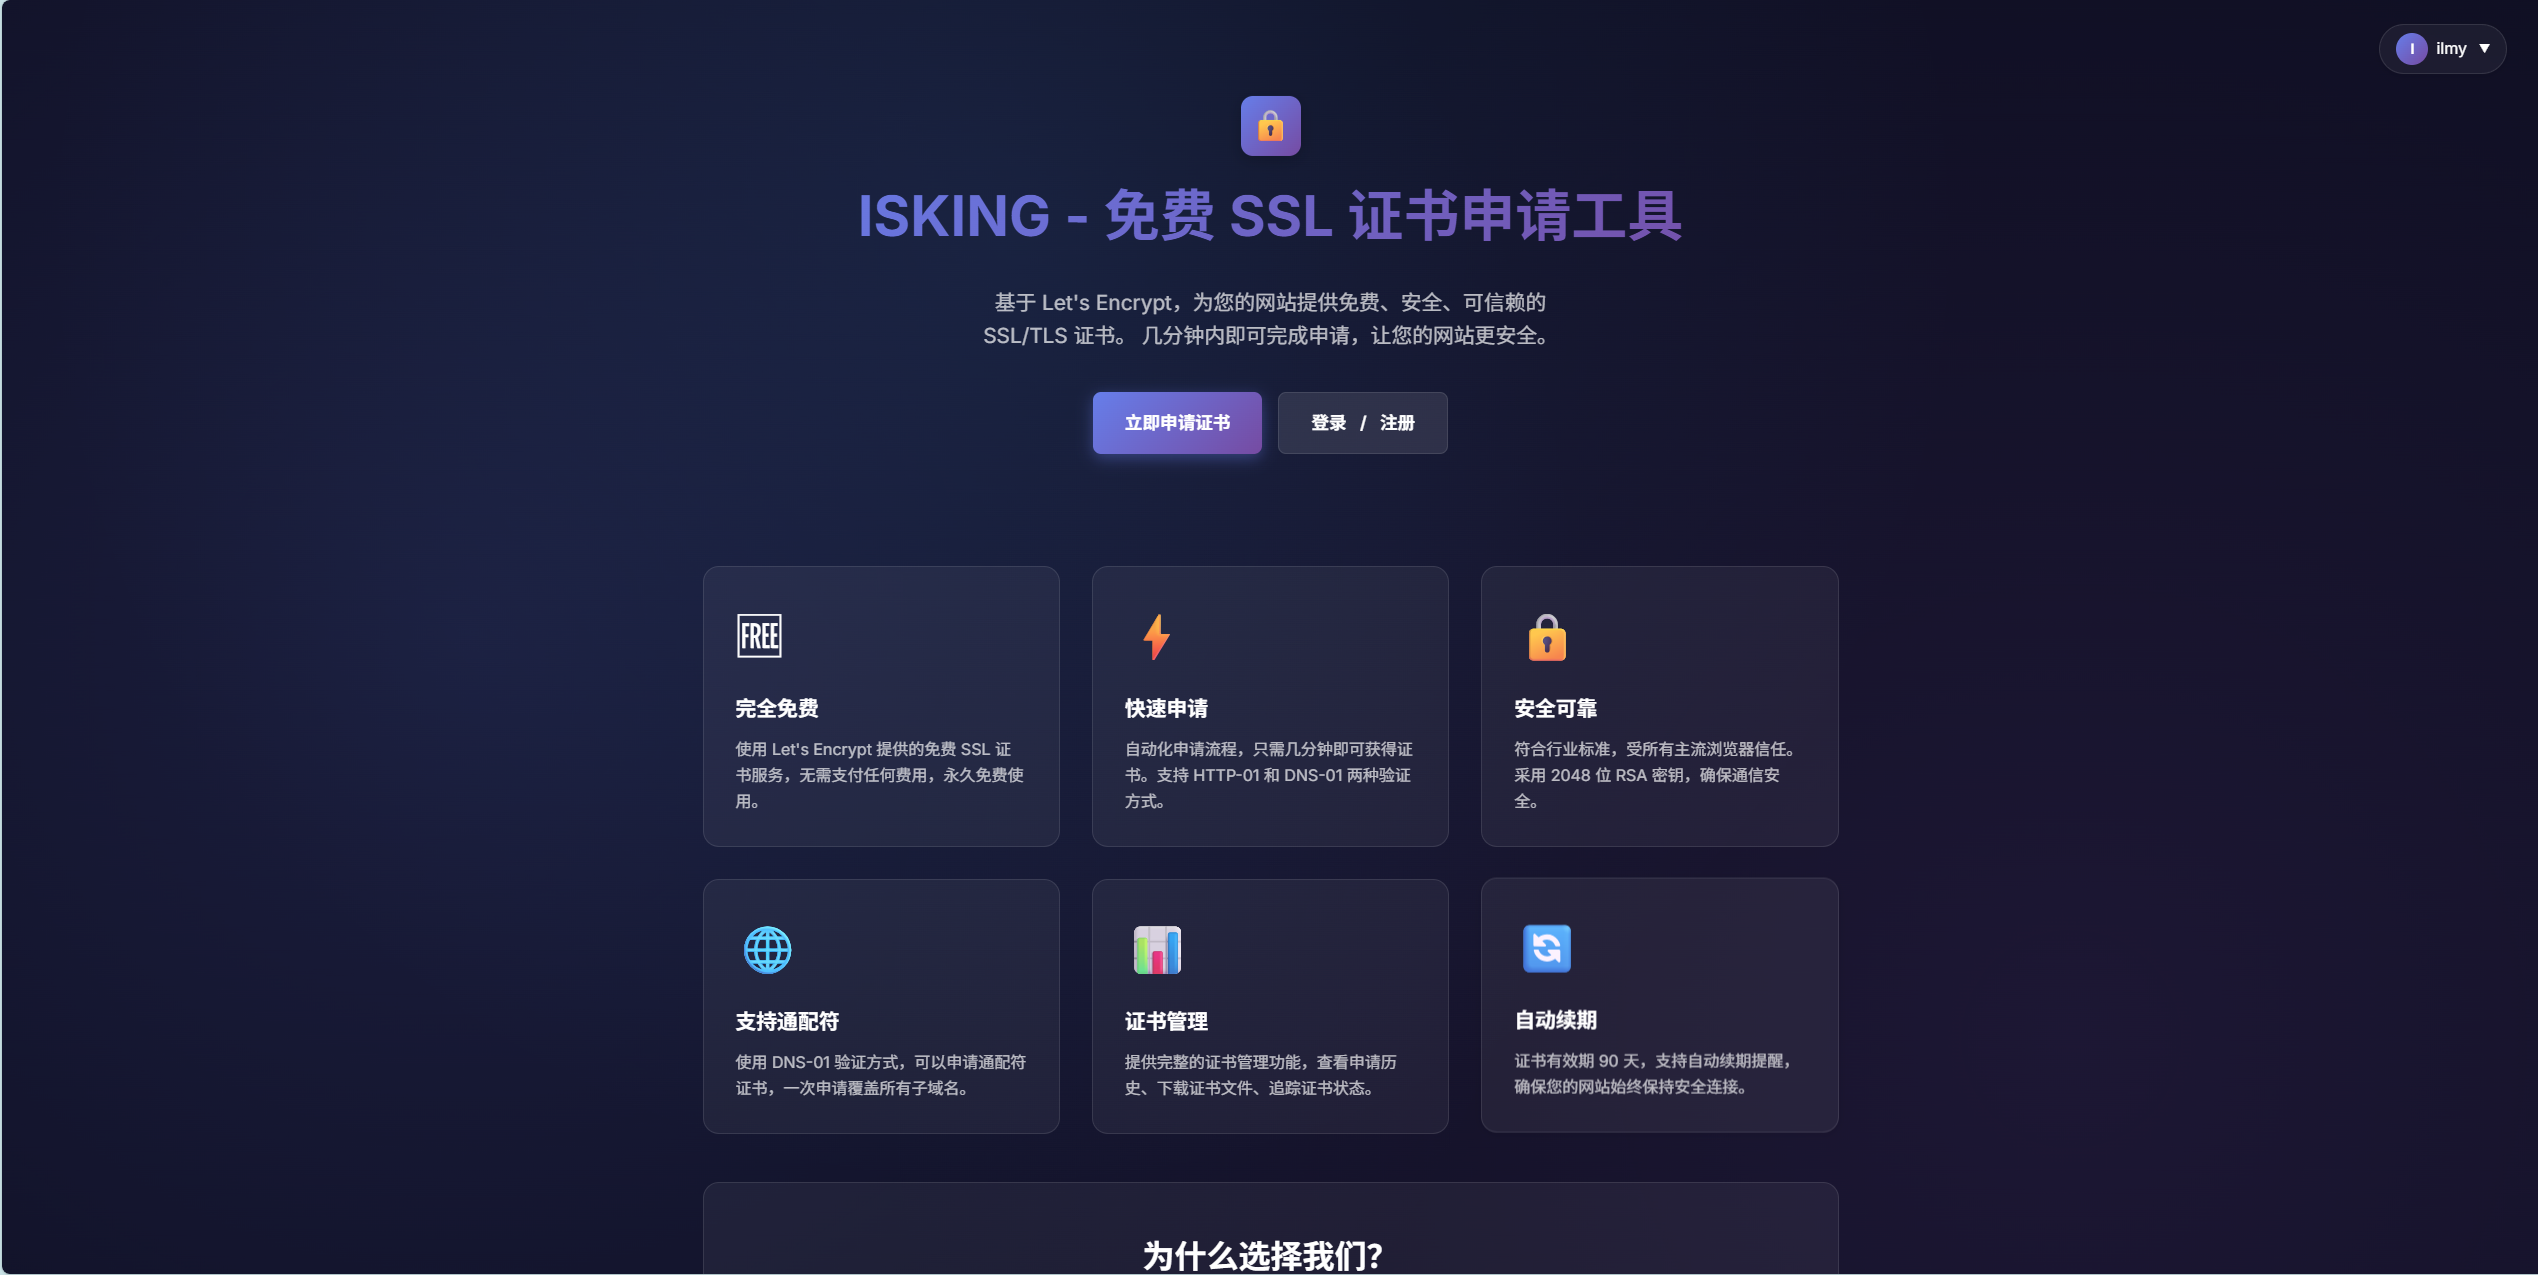
在现代 Web 开发中,HTTPS 已成为标配。本项目旨在构建一个用户友好的 SSL 证书管理平台,帮助用户轻松申请、管理和下载 SSL 证书。
项目目标
- ✅ 提供直观的证书申请流程
- ✅ 实现完整的用户认证与授权系统
- ✅ 支持邮箱验证码功能
- ✅ 提供管理员后台管理
- ✅ 优雅的 UI/UX 设计
🏗️ 技术架构
技术栈选型
后端技术
Node.js v18+          # 运行时环境
Express 4.x           # Web 框架
MongoDB + Mongoose    # 数据库
JWT                   # 身份认证
express-session       # 会话管理
nodemailer            # 邮件服务
前端技术
EJS                   # 模板引擎
Vanilla JavaScript    # 原生 JS
CSS3                  # 样式设计
项目结构
freessl/
├── bin/
│   └── www                    # 启动脚本
├── models/
│   ├── User.js               # 用户模型
│   ├── Certificate.js        # 证书模型
│   └── VerificationCode.js   # 验证码模型
├── routes/
│   ├── index.js              # 页面路由
│   ├── auth.js               # 认证 API
│   └── certificate.js        # 证书 API
├── middleware/
│   └── auth.js               # 认证中间件
├── services/
│   └── emailService.js       # 邮件服务
├── views/
│   ├── partials/             # EJS 公共组件
│   │   ├── head.ejs
│   │   ├── navbar.ejs
│   │   └── footer.ejs
│   ├── index.ejs             # 首页
│   ├── login.ejs             # 登录/注册
│   ├── apply.ejs             # 申请证书
│   ├── dashboard.ejs         # 用户仪表板
│   ├── profile.ejs           # 个人中心
│   ├── admin.ejs             # 管理后台
│   ├── forgot-password.ejs   # 找回密码
│   └── error.ejs             # 错误页面
├── public/
│   ├── javascripts/          # 前端脚本
│   └── stylesheets/          # 样式文件
├── scripts/
│   └── createAdmin.js        # 创建管理员脚本
├── .env                      # 环境变量
├── .gitignore               # Git 忽略文件
├── app.js                   # 应用主文件
└── package.json             # 项目配置
🚀 核心功能
1. 用户认证系统
功能特性
- 用户注册(邮箱验证码)
- 用户登录(JWT + Session)
- 找回密码(邮箱验证码)
- 个人信息管理
- 邮箱修改(验证码验证)
- 密码修改
技术实现
JWT + Session 双重认证
// JWT 生成
const token = jwt.sign(
  { userId: user._id, username: user.username },
  process.env.JWT_SECRET,
  { expiresIn: "7d" },
);

// Session 存储
req.session.token = token;
req.session.userId = user._id;
认证中间件
const authenticate = async (req, res, next) => {
  const token = req.session.token || req.headers.authorization?.split(" ")[1];

  if (!token) {
    return res.status(401).json({ error: "未登录" });
  }

  try {
    const decoded = jwt.verify(token, process.env.JWT_SECRET);
    const user = await User.findById(decoded.userId);
    req.user = user;
    res.locals.user = user; // 供 EJS 模板使用
    next();
  } catch (error) {
    return res.status(401).json({ error: "认证失败" });
  }
};
2. 邮箱验证码系统
功能场景
- 用户注册验证
- 修改邮箱验证
- 找回密码验证
数据模型设计
const verificationCodeSchema = new mongoose.Schema({
  email: { type: String, required: true },
  code: { type: String, required: true },
  type: {
    type: String,
    enum: ["register", "update_email", "reset_password"],
    required: true,
  },
  createdAt: {
    type: Date,
    default: Date.now,
    expires: 600, // 10分钟自动过期
  },
});
验证码生成与发送
// 生成 6 位随机验证码
const code = Math.floor(100000 + Math.random() * 900000).toString();

// 存储到数据库
await VerificationCode.create({ email, code, type });

// 发送邮件
await emailService.sendVerificationCode(email, code, type);
邮件服务实现
const nodemailer = require("nodemailer");

// SMTP 配置
const transporter = nodemailer.createTransport({
  host: process.env.SMTP_HOST,
  port: process.env.SMTP_PORT,
  secure: process.env.SMTP_SECURE === "true",
  auth: {
    user: process.env.SMTP_USER,
    pass: process.env.SMTP_PASS,
  },
});

// 发送验证码邮件
async function sendVerificationCode(to, code, type) {
  const mailOptions = {
    from: `"ISKING SSL" <${process.env.SMTP_USER}>`,
    to: to,
    subject: "【ISKING SSL】验证码",
    html: `
      <div style="font-family: Arial, sans-serif;">
        <h2>ISKING SSL 安全验证</h2>
        <p>您的验证码是:</p>
        <h1 style="color: #4facfe;">${code}</h1>
        <p>验证码 10 分钟内有效,请勿泄露给他人。</p>
      </div>
    `,
  };

  await transporter.sendMail(mailOptions);
}
3. SSL 证书管理
证书申请流程
- 填写域名信息
- 选择验证方式(DNS/文件验证)
- 完成域名验证
- 生成证书
- 下载证书文件
证书数据模型
const certificateSchema = new mongoose.Schema({
  userId: { type: mongoose.Schema.Types.ObjectId, ref: "User" },
  domain: { type: String, required: true },
  status: {
    type: String,
    enum: ["pending", "issued", "expired", "revoked"],
    default: "pending",
  },
  validFrom: Date,
  validTo: Date,
  certificateData: String,
  privateKey: String,
  createdAt: { type: Date, default: Date.now },
});
4. 管理员后台
功能特性
- 查看所有证书记录
- 统计数据展示
- 用户管理
- 证书状态管理
权限控制
const isAdmin = (req, res, next) => {
  if (!req.user || !req.user.isAdmin) {
    return res.status(403).json({ error: "权限不足" });
  }
  next();
};

// 使用
router.get("/admin", authenticate, isAdmin, (req, res) => {
  res.render("admin");
});
📖 开发历程
阶段一:项目初始化与基础架构(第 1-2 天)
任务清单
- 初始化 Express 项目
- 配置 MongoDB 连接
- 设计数据模型
- 搭建基础路由
关键代码
MongoDB 连接配置
const mongoose = require("mongoose");

const mongoDB = process.env.MONGODB_URI || "mongodb://localhost:27017/freessl";
mongoose
  .connect(mongoDB, {
    serverSelectionTimeoutMS: 5000,
    family: 4,
  })
  .then(() => console.log("MongoDB Connected"))
  .catch((err) => console.error("MongoDB Connection Error:", err));
阶段二:用户认证系统(第 3-4 天)
实现功能
- 用户注册与登录
- JWT 认证
- Session 管理
- 密码加密
遇到的问题
问题 1:Session 不稳定,频繁掉线
原因分析:
- Session cookie 配置不当
- 使用 MemoryStore 在开发环境不稳定
- 缺少
rolling配置
解决方案:
app.use(
  session({
    secret: process.env.SESSION_SECRET,
    resave: false,
    saveUninitialized: false,
    rolling: true, // ✅ 每次请求刷新 cookie 过期时间
    store:
      process.env.NODE_ENV === "production"
        ? MongoStore.create({ mongoUrl: process.env.MONGODB_URI })
        : undefined, // ✅ 开发环境使用 MemoryStore
    cookie: {
      maxAge: 1000 * 60 * 60 * 24 * 7,
      httpOnly: true,
      secure: false, // ✅ 开发环境设为 false
      rolling: true,
    },
  }),
);
问题 2:登录后立即重定向导致 Session 丢失
原因分析:
- Session 数据未及时持久化
- 异步操作竞态条件
解决方案:
// 登录成功后手动保存 Session
req.session.token = token;
req.session.userId = user._id;

// ✅ 确保 Session 保存后再响应
req.session.save((err) => {
  if (err) {
    return res.status(500).json({ error: "Session 保存失败" });
  }
  res.json({ success: true, token });
});
阶段三:EJS 视图重构(第 5-6 天)
重构目标
- 提高代码复用性
- 统一页面风格
- 简化维护成本
实现方案:Partials 组件化
创建公共组件
views/partials/head.ejs
<head>
  <meta charset="UTF-8" />
  <meta name="viewport" content="width=device-width, initial-scale=1.0" />
  <title><%= title %> - ISKING SSL</title>
  <link rel="stylesheet" href="/stylesheets/style.css" />
</head>
views/partials/navbar.ejs
<div class="user-menu">
  <% if (user) { %>
  <!-- 已登录状态 -->
  <div class="user-avatar">
    <img
      src="<%= user.avatar || '/images/default-avatar.png' %>"
      alt="Avatar"
    />
    <span><%= user.username %></span>
  </div>
  <div class="dropdown-menu">
    <a href="/">🏠 首页</a>
    <a href="/profile">👤 个人中心</a>
    <% if (user.isAdmin) { %>
    <a href="/admin">🛡️ 管理面板</a>
    <% } %>
    <a href="/dashboard">📊 我的证书</a>
    <a href="/apply">➕ 申请证书</a>
    <a href="#" onclick="logout()">🚪 退出登录</a>
  </div>
  <% } else { %>
  <!-- 未登录状态 -->
  <a href="/login" class="btn btn-primary">登录 / 注册</a>
  <% } %>
</div>
views/partials/footer.ejs
<footer>
<div class="footer-content">
<p>© 2026 ISKING SSL. All rights reserved.</p>
<div class="footer-links">
<a href="https://beian.miit.gov.cn/" target="_blank">
<img
src="https://beian.mps.gov.cn/img/logo01.dd7ff50e.png"
alt="ICP"
style="height: 16px; vertical-align: middle;"
/>
赣ICP备2025079933号-1
</a>
</div>
</div>
</footer>
在页面中使用
<!DOCTYPE html>
<html lang="zh-CN">
  <%- include('partials/head') %>
  <body>
    <%- include('partials/navbar') %>

    <!-- 页面内容 -->
    <main>
      <!-- ... -->
    </main>

    <%- include('partials/footer') %>
  </body>
</html>
遇到的问题
问题:客户端 JS 尝试更新不存在的 DOM 元素导致错误
原因分析:
- 重构后 navbar 改为服务端渲染
- 客户端 JS 仍尝试操作旧的 DOM 结构
- JavaScript 错误导致页面功能异常
解决方案:
// ❌ 删除冗余的客户端认证检查
// function checkAuth() {
//   const userMenu = document.getElementById('userMenu');
//   userMenu.innerHTML = '...';  // 这些元素已不存在
// }

// ✅ 改为服务端中间件处理
const optionalAuth = async (req, res, next) => {
  const token = req.session.token;
  if (token) {
    try {
      const decoded = jwt.verify(token, process.env.JWT_SECRET);
      const user = await User.findById(decoded.userId);
      req.user = user;
      res.locals.user = user; // ✅ 自动传递给 EJS
    } catch (error) {
      // 静默失败
    }
  }
  next();
};
阶段四:邮箱验证系统(第 7-8 天)
实现步骤
1. 安装依赖
npm install nodemailer
2. 创建验证码模型
const verificationCodeSchema = new mongoose.Schema({
  email: { type: String, required: true },
  code: { type: String, required: true },
  type: { type: String, enum: ["register", "update_email", "reset_password"] },
  createdAt: { type: Date, default: Date.now, expires: 600 },
});
3. 实现邮件服务
// services/emailService.js
const sendVerificationCode = async (to, code, type) => {
  // 开发模式:打印到控制台
  if (!process.env.SMTP_HOST) {
    console.log(`[开发模式] 验证码: ${code}`);
    return;
  }

  // 生产模式:发送邮件
  await transporter.sendMail({
    from: `"ISKING SSL" <${process.env.SMTP_USER}>`,
    to: to,
    subject: "【ISKING SSL】验证码",
    html: `<h1>${code}</h1>`,
  });
};
4. API 端点实现
// 发送验证码
router.post("/send-code", async (req, res) => {
  const { email, type } = req.body;

  // 生成验证码
  const code = Math.floor(100000 + Math.random() * 900000).toString();

  // 保存到数据库
  await VerificationCode.create({ email, code, type });

  // 发送邮件
  await emailService.sendVerificationCode(email, code, type);

  res.json({ success: true });
});

// 注册时验证
router.post("/register", async (req, res) => {
  const { username, email, password, code } = req.body;

  // 验证验证码
  const verification = await VerificationCode.findOne({
    email,
    code,
    type: "register",
  });

  if (!verification) {
    return res.status(400).json({ error: "验证码错误或已过期" });
  }

  // 创建用户
  const user = await User.create({ username, email, password });

  // 删除已使用的验证码
  await VerificationCode.deleteOne({ _id: verification._id });

  res.json({ success: true });
});
5. 前端实现(倒计时功能)
let countdown = 0;

async function sendVerificationCode() {
  if (countdown > 0) return;

  const email = document.getElementById("email").value;
  const btn = document.getElementById("sendCodeBtn");
  const originalText = btn.textContent;

  // 发送请求
  const response = await fetch("/api/auth/send-code", {
    method: "POST",
    headers: { "Content-Type": "application/json" },
    body: JSON.stringify({ email, type: "register" }),
  });

  if (response.ok) {
    // 启动倒计时
    countdown = 60;
    const timer = setInterval(() => {
      if (countdown > 0) {
        btn.textContent = `${countdown}秒后重发`;
        btn.disabled = true;
        countdown--;
      } else {
        btn.textContent = originalText;
        btn.disabled = false;
        clearInterval(timer);
      }
    }, 1000);
  }
}
遇到的问题
问题:SMTP 认证失败
错误信息:
Error: Invalid login: 535 Error: authentication failed, system busy
原因分析:
- 使用了邮箱登录密码而非授权码
- QQ/163 等邮箱需要单独生成 SMTP 授权码
解决方案:
- 登录邮箱设置页面
- 开启 SMTP 服务
- 生成授权码(不是登录密码!)
- 在
.env中使用授权码
SMTP_HOST=smtp.qq.com
SMTP_PORT=465
SMTP_SECURE=true
[email protected]
SMTP_PASS=your-authorization-code  # ✅ 使用授权码
阶段五:个人中心与找回密码(第 9-10 天)
功能实现
个人中心页面
- 修改邮箱(需验证码)
- 修改密码
- 查看个人信息
找回密码流程
- 输入注册邮箱
- 发送验证码
- 验证码验证
- 设置新密码
关键代码
修改邮箱 API
router.post("/update-profile", authenticate, async (req, res) => {
  const { email, code } = req.body;

  // 如果修改邮箱,需要验证码
  if (email !== req.user.email) {
    const verification = await VerificationCode.findOne({
      email,
      code,
      type: "update_email",
    });

    if (!verification) {
      return res.status(400).json({ error: "验证码错误" });
    }

    await VerificationCode.deleteOne({ _id: verification._id });
  }

  // 更新邮箱
  req.user.email = email;
  await req.user.save();

  res.json({ success: true });
});
重置密码 API
router.post("/reset-password", async (req, res) => {
  const { email, code, newPassword } = req.body;

  // 验证验证码
  const verification = await VerificationCode.findOne({
    email,
    code,
    type: "reset_password",
  });

  if (!verification) {
    return res.status(400).json({ error: "验证码错误或已过期" });
  }

  // 查找用户
  const user = await User.findOne({ email });
  if (!user) {
    return res.status(404).json({ error: "用户不存在" });
  }

  // 更新密码
  user.password = newPassword; // 模型中会自动加密
  await user.save();

  // 删除验证码
  await VerificationCode.deleteOne({ _id: verification._id });

  res.json({ success: true });
});
阶段六:环境变量管理(第 11 天)
配置 .env 文件
# Session Configuration
SESSION_SECRET=your-super-secret-session-key

# JWT Configuration
JWT_SECRET=your-super-secret-jwt-key

# MongoDB Configuration
MONGODB_URI=mongodb+srv://username:[email protected]/database

# SMTP Email Configuration
SMTP_HOST=smtp.qq.com
SMTP_PORT=465
SMTP_SECURE=true
[email protected]
SMTP_PASS=your-authorization-code

# Environment
NODE_ENV=development
安装并配置 dotenv
npm install dotenv
// app.js 第一行
require("dotenv").config();
修改代码使用环境变量
// MongoDB 连接
const mongoDB = process.env.MONGODB_URI || "mongodb://localhost:27017/freessl";

// Session 配置
app.use(
  session({
    secret: process.env.SESSION_SECRET,
    store:
      process.env.NODE_ENV === "production"
        ? MongoStore.create({ mongoUrl: process.env.MONGODB_URI })
        : undefined,
  }),
);

// JWT 签名
const token = jwt.sign(payload, process.env.JWT_SECRET, { expiresIn: "7d" });
配置 .gitignore
# Environment variables
.env
.env.local
.env.*.local

# Dependencies
node_modules/

# Logs
*.log

# IDE
.vscode/
.idea/
🔧 技术难点与解决方案
1. Session 持久化与稳定性
问题描述
开发过程中频繁遇到 Session 丢失,用户需要反复登录。
根本原因
- Cookie 配置问题:
secure: true在 HTTP 环境下无法设置 cookie - Session 存储问题:MemoryStore 在某些情况下不稳定
- 异步竞态条件:Session 未保存完成就发送响应
完整解决方案
// 1. 环境适配的 Session 配置
app.use(
  session({
    secret: process.env.SESSION_SECRET,
    resave: false,
    saveUninitialized: false,
    rolling: true, // ✅ 关键:每次请求刷新过期时间

    // ✅ 生产环境用 MongoDB,开发环境用内存
    store:
      process.env.NODE_ENV === "production"
        ? MongoStore.create({
            mongoUrl: process.env.MONGODB_URI,
            touchAfter: 24 * 3600,
          })
        : undefined,

    cookie: {
      maxAge: 1000 * 60 * 60 * 24 * 7,
      httpOnly: true,
      secure: false, // ✅ 开发环境必须为 false
      sameSite: "lax",
      rolling: true,
    },
  }),
);

// 2. 手动保存 Session
router.post("/login", async (req, res) => {
  // ... 验证用户 ...

  req.session.token = token;
  req.session.userId = user._id;

  // ✅ 确保保存后再响应
  req.session.save((err) => {
    if (err) {
      return res.status(500).json({ error: "Session 保存失败" });
    }
    res.json({ success: true, token });
  });
});
2. 服务端渲染与客户端状态同步
问题描述
重构为 Partials 后,客户端 JavaScript 尝试操作不存在的 DOM 元素,导致错误。
解决方案
服务端:自动注入用户数据
// middleware/auth.js
const authenticate = async (req, res, next) => {
  // ... 验证 token ...
  req.user = user;
  res.locals.user = user; // ✅ 自动传递给所有 EJS 模板
  next();
};

const optionalAuth = async (req, res, next) => {
  // ... 可选认证 ...
  if (user) {
    res.locals.user = user; // ✅ 同样传递
  }
  next();
};
路由:应用中间件
router.get("/", optionalAuth, (req, res) => {
  res.render("index", { title: "首页" });
  // 不需要手动传递 user,res.locals.user 已自动可用
});
客户端:移除冗余代码
// ❌ 删除这些代码
// function checkAuth() {
//   fetch('/api/auth/me').then(...)
// }
// checkAuth();

// ✅ 服务端已处理,无需客户端检查
3. 邮箱验证码的安全性设计
安全考虑
- 验证码过期:10 分钟自动失效
- 一次性使用:验证后立即删除
- 频率限制:60 秒内不能重复发送
- 类型隔离:不同场景的验证码互不干扰
实现方案
数据库层:TTL 索引
const verificationCodeSchema = new mongoose.Schema({
  email: String,
  code: String,
  type: String,
  createdAt: {
    type: Date,
    default: Date.now,
    expires: 600, // ✅ MongoDB 自动删除过期文档
  },
});
应用层:频率限制
router.post("/send-code", async (req, res) => {
  const { email, type } = req.body;

  // ✅ 检查是否在 60 秒内发送过
  const recentCode = await VerificationCode.findOne({
    email,
    type,
    createdAt: { $gt: new Date(Date.now() - 60000) },
  });

  if (recentCode) {
    return res.status(429).json({
      error: "请求过于频繁,请稍后再试",
    });
  }

  // 生成并发送验证码
  // ...
});
验证层:一次性使用
router.post("/register", async (req, res) => {
  const { email, code } = req.body;

  const verification = await VerificationCode.findOne({ email, code });

  if (!verification) {
    return res.status(400).json({ error: "验证码错误或已过期" });
  }

  // ✅ 验证成功后立即删除
  await VerificationCode.deleteOne({ _id: verification._id });

  // 创建用户
  // ...
});
4. 密码安全存储
实现方案
使用 bcrypt 加密
const bcrypt = require("bcryptjs");

const userSchema = new mongoose.Schema({
  username: String,
  email: String,
  password: String,
});

// ✅ 保存前自动加密
userSchema.pre("save", async function (next) {
  if (!this.isModified("password")) return next();

  this.password = await bcrypt.hash(this.password, 10);
  next();
});

// ✅ 验证密码方法
userSchema.methods.comparePassword = async function (candidatePassword) {
  return await bcrypt.compare(candidatePassword, this.password);
};
登录验证
router.post("/login", async (req, res) => {
  const { email, password } = req.body;

  const user = await User.findOne({ email });
  if (!user) {
    return res.status(401).json({ error: "用户不存在" });
  }

  // ✅ 使用安全的密码比对
  const isMatch = await user.comparePassword(password);
  if (!isMatch) {
    return res.status(401).json({ error: "密码错误" });
  }

  // 生成 token
  // ...
});
💡 最佳实践总结
1. 代码组织
模块化设计
✅ 单一职责原则
   - models/     数据模型
   - routes/     路由处理
   - middleware/ 中间件
   - services/   业务逻辑

✅ DRY 原则(Don't Repeat Yourself)
   - 使用 EJS Partials 复用组件
   - 提取公共中间件
   - 封装工具函数
命名规范
// ✅ 清晰的命名
const authenticate = async (req, res, next) => { ... }
const sendVerificationCode = async (to, code, type) => { ... }

// ❌ 避免模糊命名
const auth = async (req, res, next) => { ... }
const send = async (to, code, type) => { ... }
2. 安全性
环境变量管理
// ✅ 敏感信息使用环境变量
const secret = process.env.JWT_SECRET;

// ❌ 避免硬编码
const secret = "my-secret-key";
输入验证
// ✅ 验证用户输入
if (!email || !email.includes("@")) {
  return res.status(400).json({ error: "邮箱格式错误" });
}

// ✅ 使用参数化查询(Mongoose 自动处理)
const user = await User.findOne({ email });
HTTPS 与 Cookie 安全
cookie: {
  httpOnly: true,     // ✅ 防止 XSS
  secure: process.env.NODE_ENV === 'production',  // ✅ HTTPS only
  sameSite: 'lax',    // ✅ 防止 CSRF
}
3. 错误处理
统一错误响应
// ✅ 一致的错误格式
res.status(400).json({ error: "错误信息" });

// ✅ 捕获异步错误
router.post("/api/endpoint", async (req, res) => {
  try {
    // 业务逻辑
  } catch (error) {
    console.error("Error:", error);
    res.status(500).json({ error: "服务器错误" });
  }
});
全局错误处理
// app.js
app.use((err, req, res, next) => {
  console.error(err.stack);

  res.status(err.status || 500);
  res.render("error", {
    message: err.message,
    error: process.env.NODE_ENV === "development" ? err : {},
  });
});
4. 性能优化
数据库索引
// ✅ 为常用查询字段添加索引
userSchema.index({ email: 1 }, { unique: true });
certificateSchema.index({ userId: 1, status: 1 });
分页查询
// ✅ 避免一次性加载大量数据
const page = parseInt(req.query.page) || 1;
const limit = 10;
const skip = (page - 1) * limit;

const certificates = await Certificate.find({ userId })
  .skip(skip)
  .limit(limit)
  .sort({ createdAt: -1 });
5. 用户体验
加载状态
// ✅ 显示加载动画
function showLoading(show) {
  const overlay = document.getElementById("loadingOverlay");
  overlay.classList.toggle("hidden", !show);
}

// 使用
showLoading(true);
await fetch("/api/endpoint");
showLoading(false);
友好的错误提示
// ✅ 具体的错误信息
if (!email) {
  return res.status(400).json({ error: "请输入邮箱地址" });
}

// ❌ 避免模糊提示
if (!email) {
  return res.status(400).json({ error: "参数错误" });
}
倒计时功能
// ✅ 防止重复点击
let countdown = 0;

function sendCode() {
  if (countdown > 0) return; // 倒计时中,禁止点击

  countdown = 60;
  const timer = setInterval(() => {
    if (countdown > 0) {
      btn.textContent = `${countdown}秒后重发`;
      countdown--;
    } else {
      btn.textContent = "发送验证码";
      clearInterval(timer);
    }
  }, 1000);
}
🎨 UI/UX 设计亮点
1. 现代化设计语言
配色方案
:root {
  --primary: #4facfe;
  --primary-dark: #00c6ff;
  --success: #00d4aa;
  --danger: #ff6b6b;
  --warning: #ffd93d;
  --text-primary: #2c3e50;
  --text-secondary: #7f8c8d;
  --bg-light: #f8f9fa;
}
渐变效果
.gradient-bg {
  background: linear-gradient(135deg, #667eea 0%, #764ba2 100%);
}

.card {
  background: linear-gradient(135deg, #4facfe 0%, #00f2fe 100%);
  box-shadow: 0 10px 30px rgba(79, 172, 254, 0.3);
}
2. 交互动画
按钮悬停效果
.btn {
  transition: all 0.3s ease;
}

.btn:hover {
  transform: translateY(-2px);
  box-shadow: 0 5px 15px rgba(0, 0, 0, 0.2);
}
页面过渡
.page-transition {
  animation: fadeIn 0.5s ease;
}

@keyframes fadeIn {
  from {
    opacity: 0;
    transform: translateY(20px);
  }
  to {
    opacity: 1;
    transform: translateY(0);
  }
}
3. 响应式设计
/* 移动端适配 */
@media (max-width: 768px) {
  .container {
    padding: 1rem;
  }

  .card {
    margin: 1rem 0;
  }

  .stats-grid {
    grid-template-columns: 1fr;
  }
}
📊 项目统计
代码量统计
总文件数:      45+
代码行数:      5000+
JavaScript:    3000+
EJS/HTML:      1500+
CSS:           500+
功能模块
✅ 用户认证系统
✅ 邮箱验证系统
✅ SSL 证书管理
✅ 个人中心
✅ 管理员后台
✅ 找回密码
✅ 响应式设计
技术栈
后端:Node.js + Express + MongoDB
前端:EJS + Vanilla JS + CSS3
认证:JWT + Session
邮件:Nodemailer
数据库:Mongoose ODM
🚀 未来展望
短期计划(1-2 个月)
功能增强
- 添加双因素认证(2FA)
- 支持 OAuth 登录(Google、GitHub)
- 证书自动续期提醒
- 批量证书管理
性能优化
- 实现 Redis 缓存
- CDN 加速静态资源
- 数据库查询优化
- 前端资源压缩
用户体验
- 添加暗黑模式
- 多语言支持(i18n)
- 更丰富的数据可视化
- 移动端 App
长期规划(3-6 个月)
技术升级
- 迁移到 TypeScript
- 使用 React/Vue 重构前端
- 微服务架构拆分
- Docker 容器化部署
业务拓展
- 付费证书服务
- API 开放平台
- 企业级功能
- 白标解决方案
运维监控
- 日志系统(ELK)
- 性能监控(Prometheus)
- 错误追踪(Sentry)
- 自动化测试(Jest)
📝 总结
技术收获
全栈开发能力
- 掌握了 Express 框架的深度使用
- 理解了 JWT 与 Session 的认证机制
- 熟悉了 MongoDB 的数据建模
工程化思维
- 学会了模块化代码组织
- 掌握了环境变量管理
- 理解了前后端分离的优势
问题解决能力
- Session 持久化问题的排查与解决
- 异步编程中的竞态条件处理
- 邮件服务的配置与调试
开发心得
细节决定成败
- 一个
secure: false的配置可能导致整个认证系统失效 - Session 的
save()调用时机至关重要 - 环境变量的正确使用能避免很多安全隐患
- 一个
用户体验优先
- 加载动画能显著提升用户感知
- 友好的错误提示减少用户困惑
- 响应式设计是现代 Web 的必备
安全性不容忽视
- 密码必须加密存储
- 验证码需要过期机制
- Cookie 配置要考虑 XSS 和 CSRF
致谢
感谢所有开源项目和社区的贡献者,特别是:
- Express.js 团队
- Mongoose 团队
- Nodemailer 团队
- 以及所有提供帮助的开发者
📚 参考资源
官方文档
学习资源
工具推荐
- Postman - API 测试
- MongoDB Compass - 数据库管理
- VS Code - 代码编辑器
项目地址: GitHub Repository
在线访问: Site
作者: ISKING
日期: 2026-01-24
💡 提示:本文档持续更新中,欢迎提出建议和反馈!
评论 (2)
发表评论
1
2
3
4
5
快来评论吧!